• Keep The Power Off During Installation (Before You Cover The Panel)
• Check The Terminal Connections Before Wiring
• Connect The Device In Accordance With The Relevant Diagrams
• Ensure That No Bare Wires From The Terminals In Case Of Electric Shock
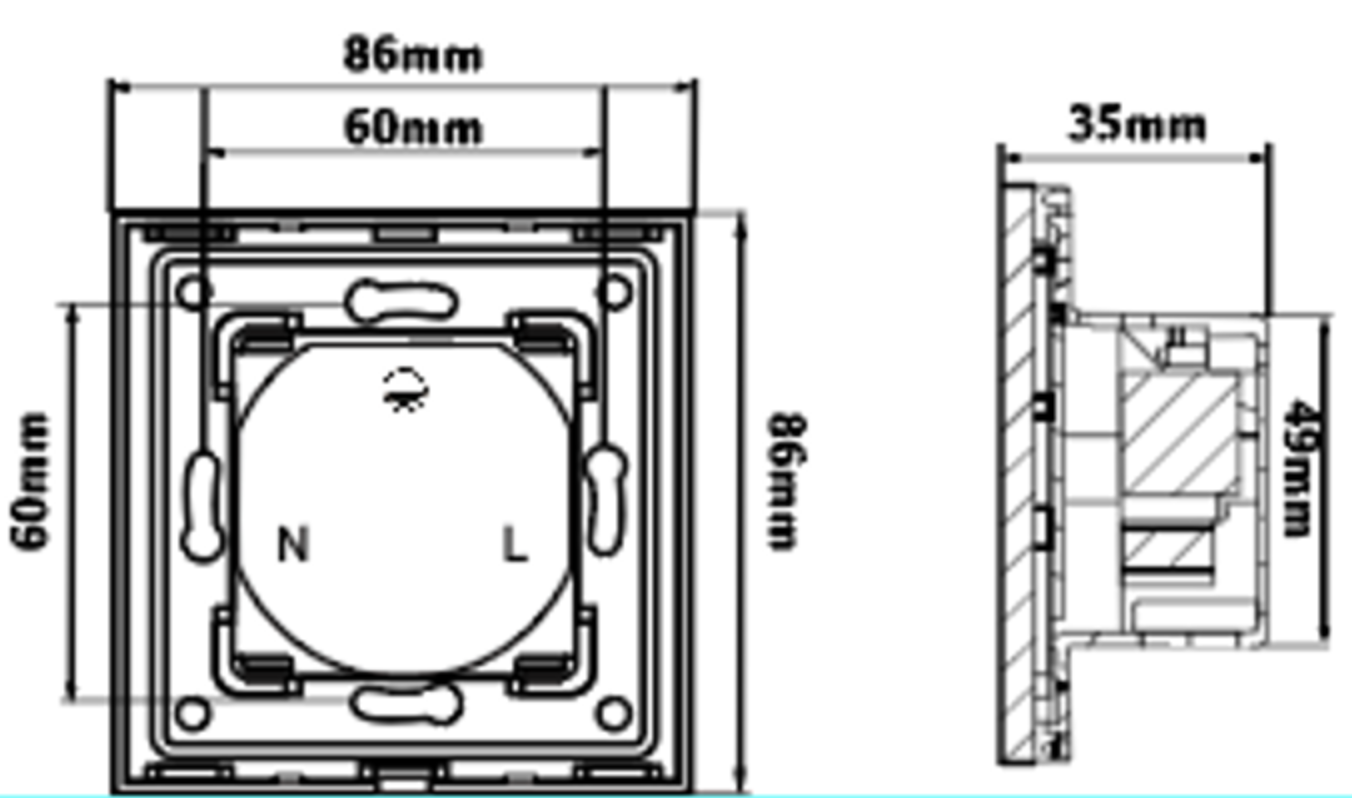
1. L Live Terminal
2. N Neutral Terminal
3. Earth Terminal
Warning: Don’t Switch On The Appliance Before Installation Is Finished Completely

All types of socket installation and wiring methods are the same(Including normal socket and WIFI socket)

1. Open The Box, Take Out The Parts, Distinguish The Front And Back Of The Metal Plate
(Note: The Side With CE And RoHS Is The Back Side)
2. Assemble Insert Parts And Metal Plate
(Note: Push The Insert Parts Into Metal Plate From The Front Side)
3. Follow The Wiring Instructions To Connect The Wires
4. Screw To Fix The Switch To The Wall Box
5. Push The Glass Panel Onto The Device And Finish The Installation
Note: Only The Metal Plate Notch Side Match WithThe GlassPanelNotchSide, They Can Be Assembled Together Successfully
Warning: Keep The Power Off Until You Finish The Installation Otherwise The Switch May Fail

Separate The Glass Panel And Metal Plate From The Groove With A Screwdriver (Just In Case The Glass Panel Is Scratched)
Input: AC 110-250V
Operating Freq:50/60Hz
Life Time: 100,000Times
RF Frequency: 433.92MHz
Capability Allowance: -15%~+10%
Ambient Humidity: ≤93%
Operating Temp: -20℃ to 70℃
Power Consumption: ≤0.02W